Publishing web applications in of VS 2010 (IIS 7)
A key issue when deploying ASP.NET applications is the need to manage the many configurations needed for development, testing, staging, production and so on. Configuration items such as connection strings, app & debug settings and service endpoints need to be set according to their target runtime environments. Deployment to different environment involves manual procedures, tweaking and managing build scripts and hooks.
VS 2010 now provides a feature of web packaging, single click deployment and web.config transformations which makes configuration management easier. VS10’s new web.config transformation model allows you to modify your web.config file in an automated fashion during deployment of your applications to various server environments.
Requirements for this web deployment test:
- IIS 7 on both deployment and target servers.
- Web Deployment Service should be running on both servers. You can download the installer from http://technet.microsoft.com/en-us/library/dd569059%28WS.10%29.aspx
- Account which is being used to deploy MUST have admin rights on the target environment.
web.config Transformations:
VS 2010 now has support for Web.config Transformations which keeps configurations consistent across target environments, making configuration management easier. Once setup, the transformations do this by allowing you to smoothly transition between deployment environments (e.g., debug, release or staging) without having to juggle .config files. When a deployment package is built, a final version of the web.config specific to that configuration is created. This happens as the transformation engine parses the transforms in the .config source file and outputs a customized web.config file.
A config transform file is an XML file that specifies how the web.config file should be changed, by using transform syntax. We should create one transform file for each configuration environment we need (e.g., debug, release or staging). The transformation engine combines the source web.config file with the transforms in the transformation file then creates the final web.config ready to deploy. This process works without modifying the web.config or any of the configuration specific .config files.
Be sure you add the information you want in the web.config such as connection strings, application settings, etc…If a setting isn’t in the web.config, it can’t be transformed.
I will go through below steps to explain web.config transformation in detail.
- Creating a “Staging” Configuration on developer box
- Adding a “Staging” Web.Config Transform file to project
- Writing simple transforms to change developer box connection string settings into “Staging” environment settings
- Generating a new transformed web.config file for “Staging” environment from VS UI
Step 1: Creating a “Staging” Configuration on developer box
Debug and Release build configurations are available by default within Visual Studio but if you would like to add more build configurations (for various server environments like “Dev”, “QA”, “Staging”, “Production” etc then you can do so by going to the Project menu Build --> Configuration Manager --> Select New from Active Solution Configuration box).
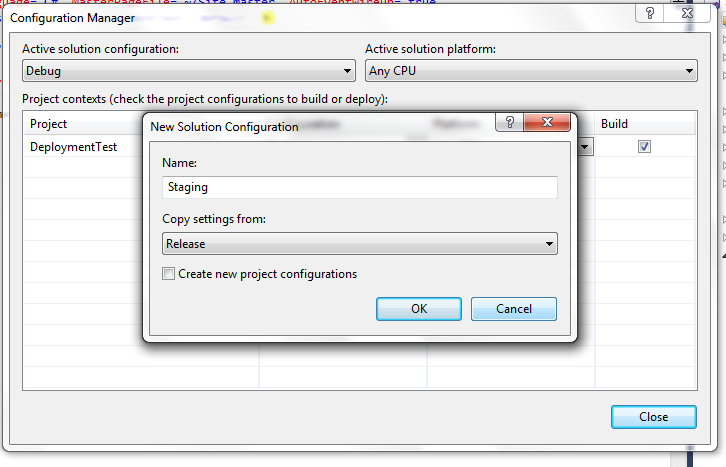
Here I have created a new configuration named “Staging”.
These web.config files follow a naming convention of web.configuration.config. For example the web.config files for various Visual Studio + Custom configurations will look as below: 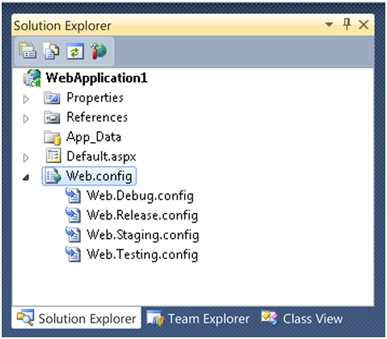
Any new Web Application Project (WAP) created in VS10 will by default have Web.Debug.config and Web.Release.config files added to the project. To add configuration specific transform file (e.g. Web.Staging.Config) you can right click the original web.config file and click the context menu command “Add Config Transforms” as shown below:

On clicking the “Add Config Transform” command VS10 will detect the configurations that do not have a transform associated with them and will automatically creates the missing transform files. It will not overwrite an existing transform file. If you do not want a particular configuration transform file then you can feel free to delete it off.

Step 3: Writing simple transforms to change developer box connection string settings into “Staging” environment settings
Web.Config Transformation Engine is a simple XML Transformation Engine which takes a source file (your project’s original web.config file) and a transform file (e.g. web.staging.config) and produces an output file (web.config ready for staging environment).
The Transform file (e.g. web.staging.config ) needs to have XML Document Transform namespace registered at the root node as shown below:
xml version="1.0"?> <configuration xmlns:xdt="http://schemas.microsoft.com/XML-Document-Transform"> configuration>
Transform – This attribute inside the Web.Staging.config informs the Transformation engine the way to modify web.config file for specific configuration (i.e. staging). Some examples of what Transforms can do are:
- Replacing a node
- Inserting a node
- Delete a node
- Removing Attributes
- Setting Attributes
Locator – This attribute inside the web.staging.config helps the Transformation engine to exactly pin-point the web.config node that the transform from web.staging.config should be applied to.
Let us examine the original web.config file and identify the items to replace... Let’s assume that the original Web Config file’s connection string section looks as below:

In above web.config we want to change the connection string when moving to staging environment.
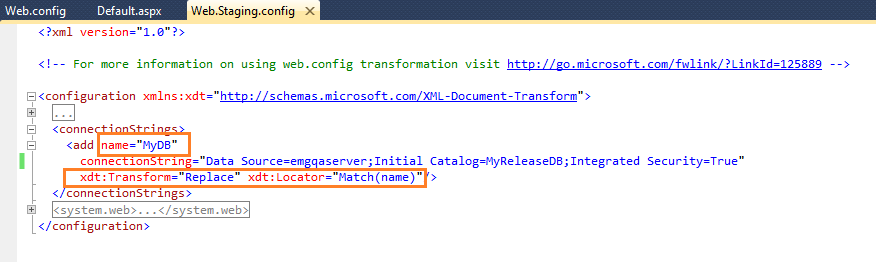
The above syntax in web.staging.config has Transform and Locator attributes from the xdt namespace. If we analyze the connection string node syntax we can notice that the Transform used here is “Replace” which is instructing the Transformation Engine to Replace the entire node
Further if we notice the Locator used here is “Match” which is informing Transformation engine that among all the “configuration/connectionStrings/add” nodes that are found, pick up the node whose name attribute matches with the name attribute of
Step 4: Generating a new transformed web.config file for “Staging” environment from VS UI
- Web packaging: Set the desired configuration in drop down in project settings (Package/Publish Web)

More will be discussed in Web packaging section.
- Single click deployment: using profiles. Profile name must match the configuration name. We will see it in Single click deployment section.
Web Application Deployment:
There are 2 ways to deploy a web application.
- Web packaging
- Single click deployment
In this article I will discuss both methods. First create a new test web application.
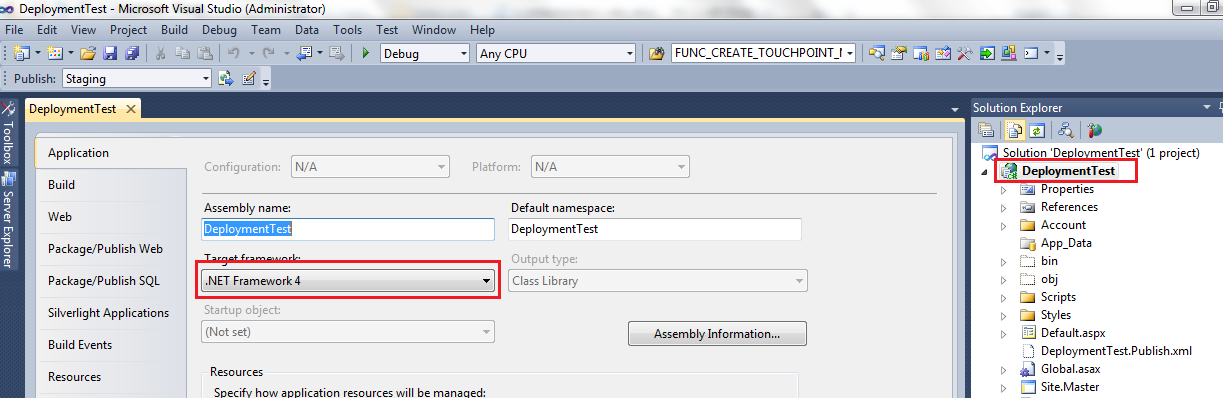
Create a new web application project.

Take care of the target framework as it might need some configuration changes in IIS (like setting up appropriate Application Pool).
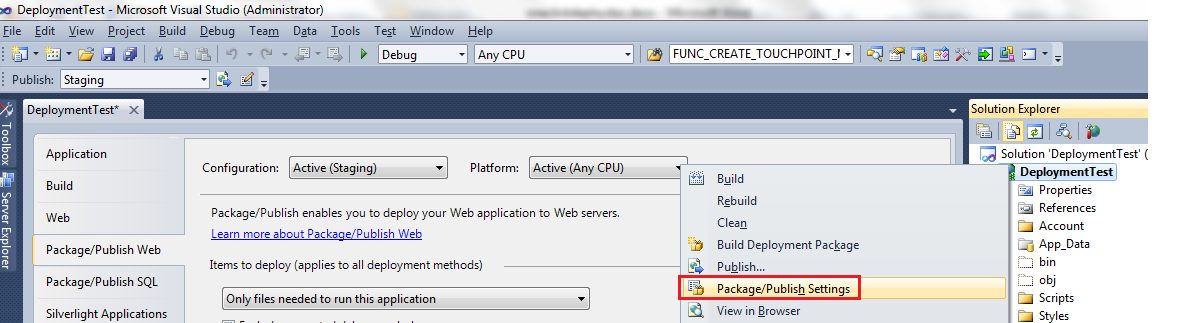
- Web package deployment: Right click on project and go to Properties. There select the tab Package/Publish Web. Check the Create deployment package as a zip file option. Provide the IIS web site address of the target environment.
*Note: Here in configuration drop down selected option is Active(Staging). By default ASP.Net provides 2 options here: Release and Debug. Here I have selected Staging configuration as discussed in previous section.

This tab can also be accessed by right clicking on project and selecting Package/Publish Settings.
- Right click on project properties and click on Build Deployment Package option.
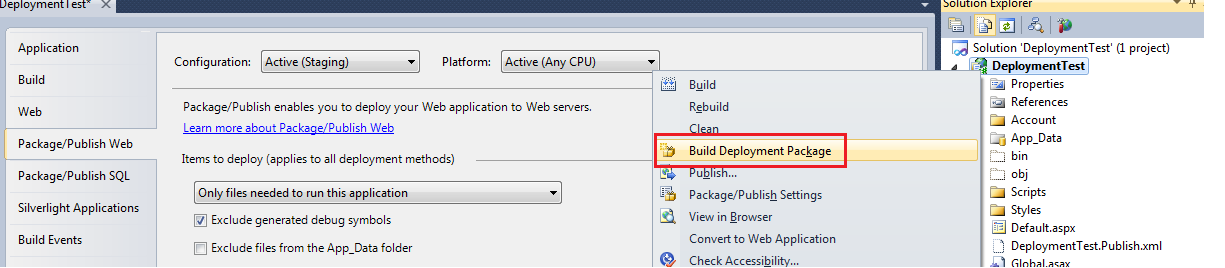
- This will create a zip file. Copy/share this path with the target environment. This will also transform the web.config file if any any transform file exists with the configuration name (e.g. web.Staging.config).

You can also see the packaged file created in obj folder in solution explorer. Here we can also see the transformed web.config file.
.

- Copy this zip file and go to the target environment and open IIS (7). Right click on Default Web Site -> Deploy-> Click on Import Application option.
*Note: Make sure to delete any existing application/data before import. In my test I found that it does not overwrite the already published code.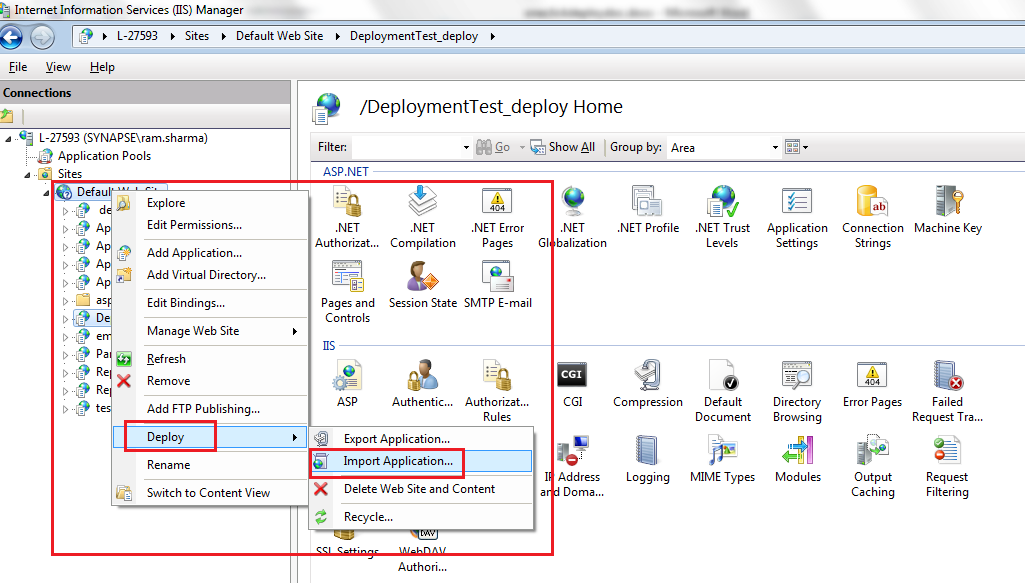
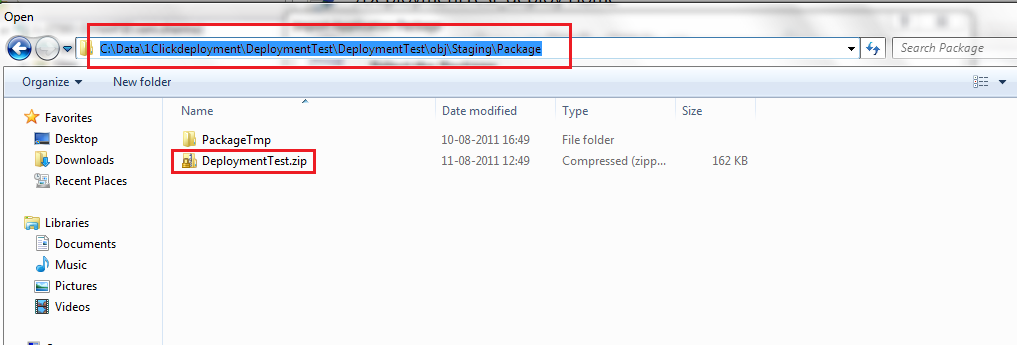
- Select the path of zip file.
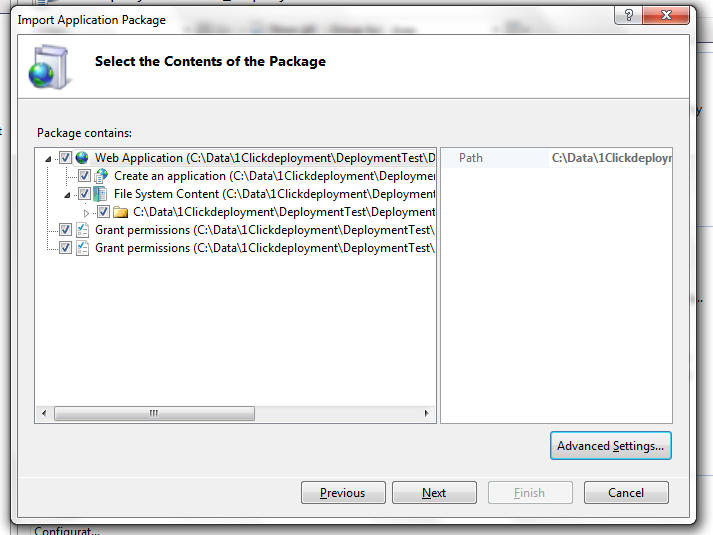
- Click on Next. Check all options.

- Click on Next. Check all options.
- You may change the web site name and connection string as well.
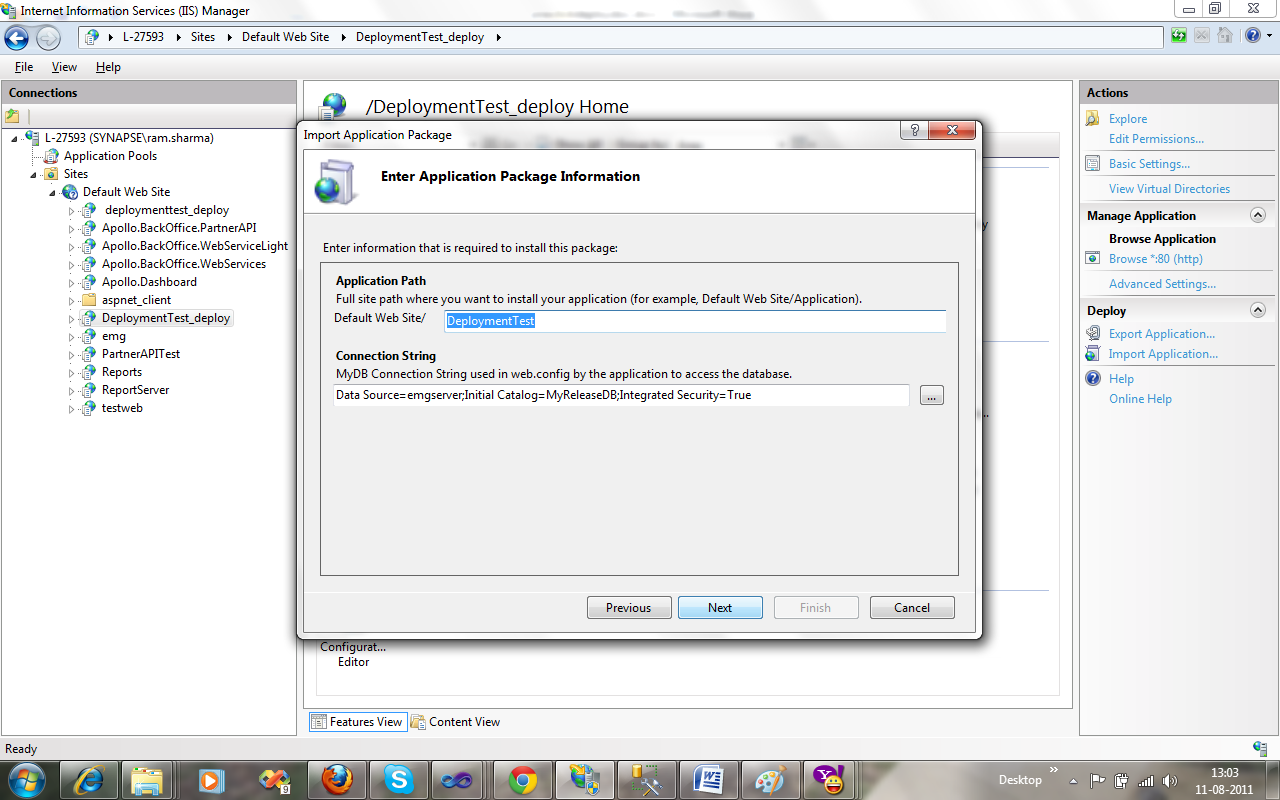
- Click on Next and your package must be imported now. Click on Finish button.

- Your site should be shown in left panel under Default Web Site.

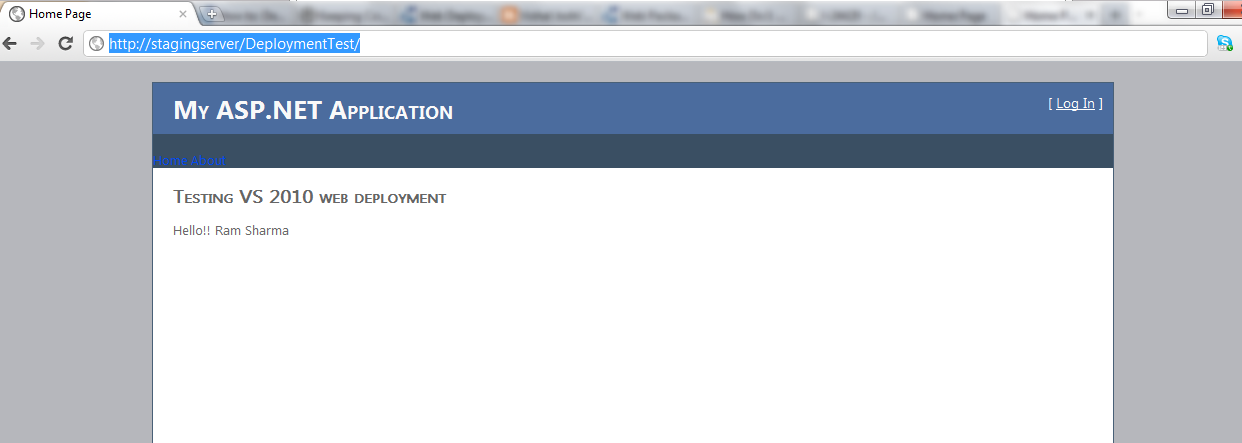
- Try to run application in browser.
2. Single Click deployment:
Before you can publish the Web application, you must create a publish profile that specifies how to publish. We can create multiple profiles that have different settings. Before we click the Publish button, we can select the profile that has the settings that we want to use. The publish profile settings apply to the active build configuration (for example, Debug or Release, Staging etc).
- To create a publish profile:
- Right click on project and select Publish.
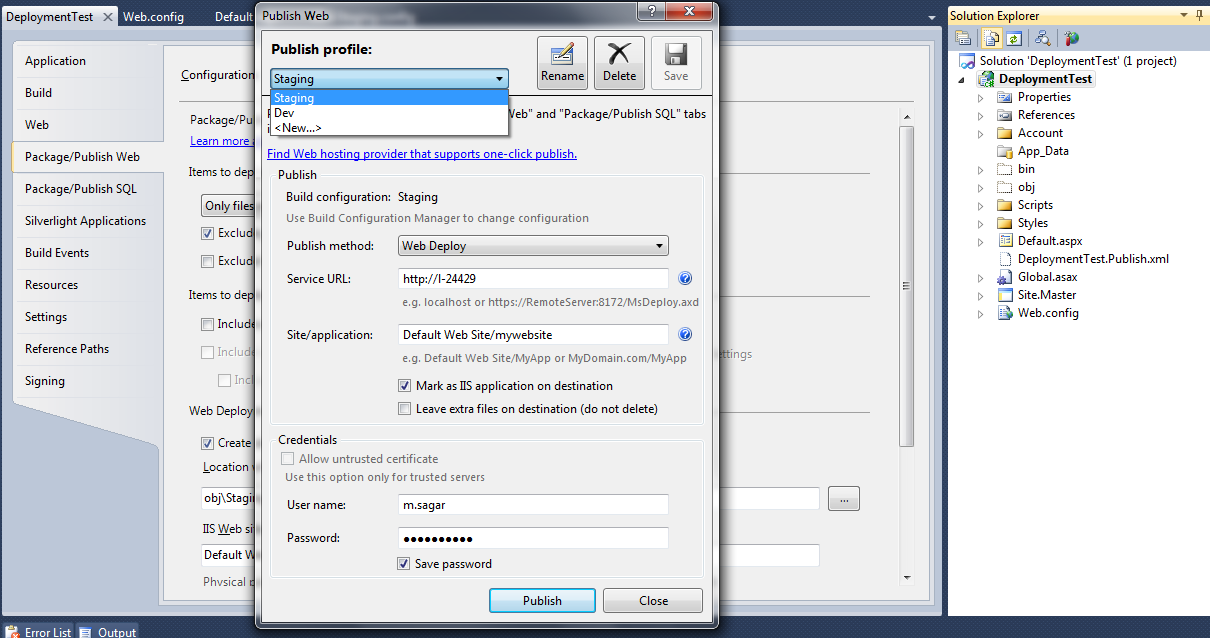
Above are the settings I made for my staging server. You can create new profiles by clicking on New link.
- In the Publish Method select Web Deploy.
- Enter a value for Service URL. If you are publishing to the development computer (that is, to your computer), enter localhost or the name of your computer
- In credential section, provide credential of the admin user who is authorized to deploy.
- Click on Publish button to publish the code on server.
Note: If we have created web.config transform file (configurations) then our profile name MUST match with the configuration name. This way once deployed it will transform the web.config file with correct transform file. If it does not find any corresponding transform file then it will copy web.config file on the server.
Once Publish Success message appears then try to access the web application on your staging server.

Similarly you can create different profiles and can use a single click deploy. There is a toolbar also for single click deployment. We can directly deploy web application using this toolbar by selecting the desired profile.

This is all about the web deployment features of VS 2010.
No comments:
Post a Comment